Prerequisites: Make sure you’ve installed cmd and configured at least one AI provider.
Your First Task
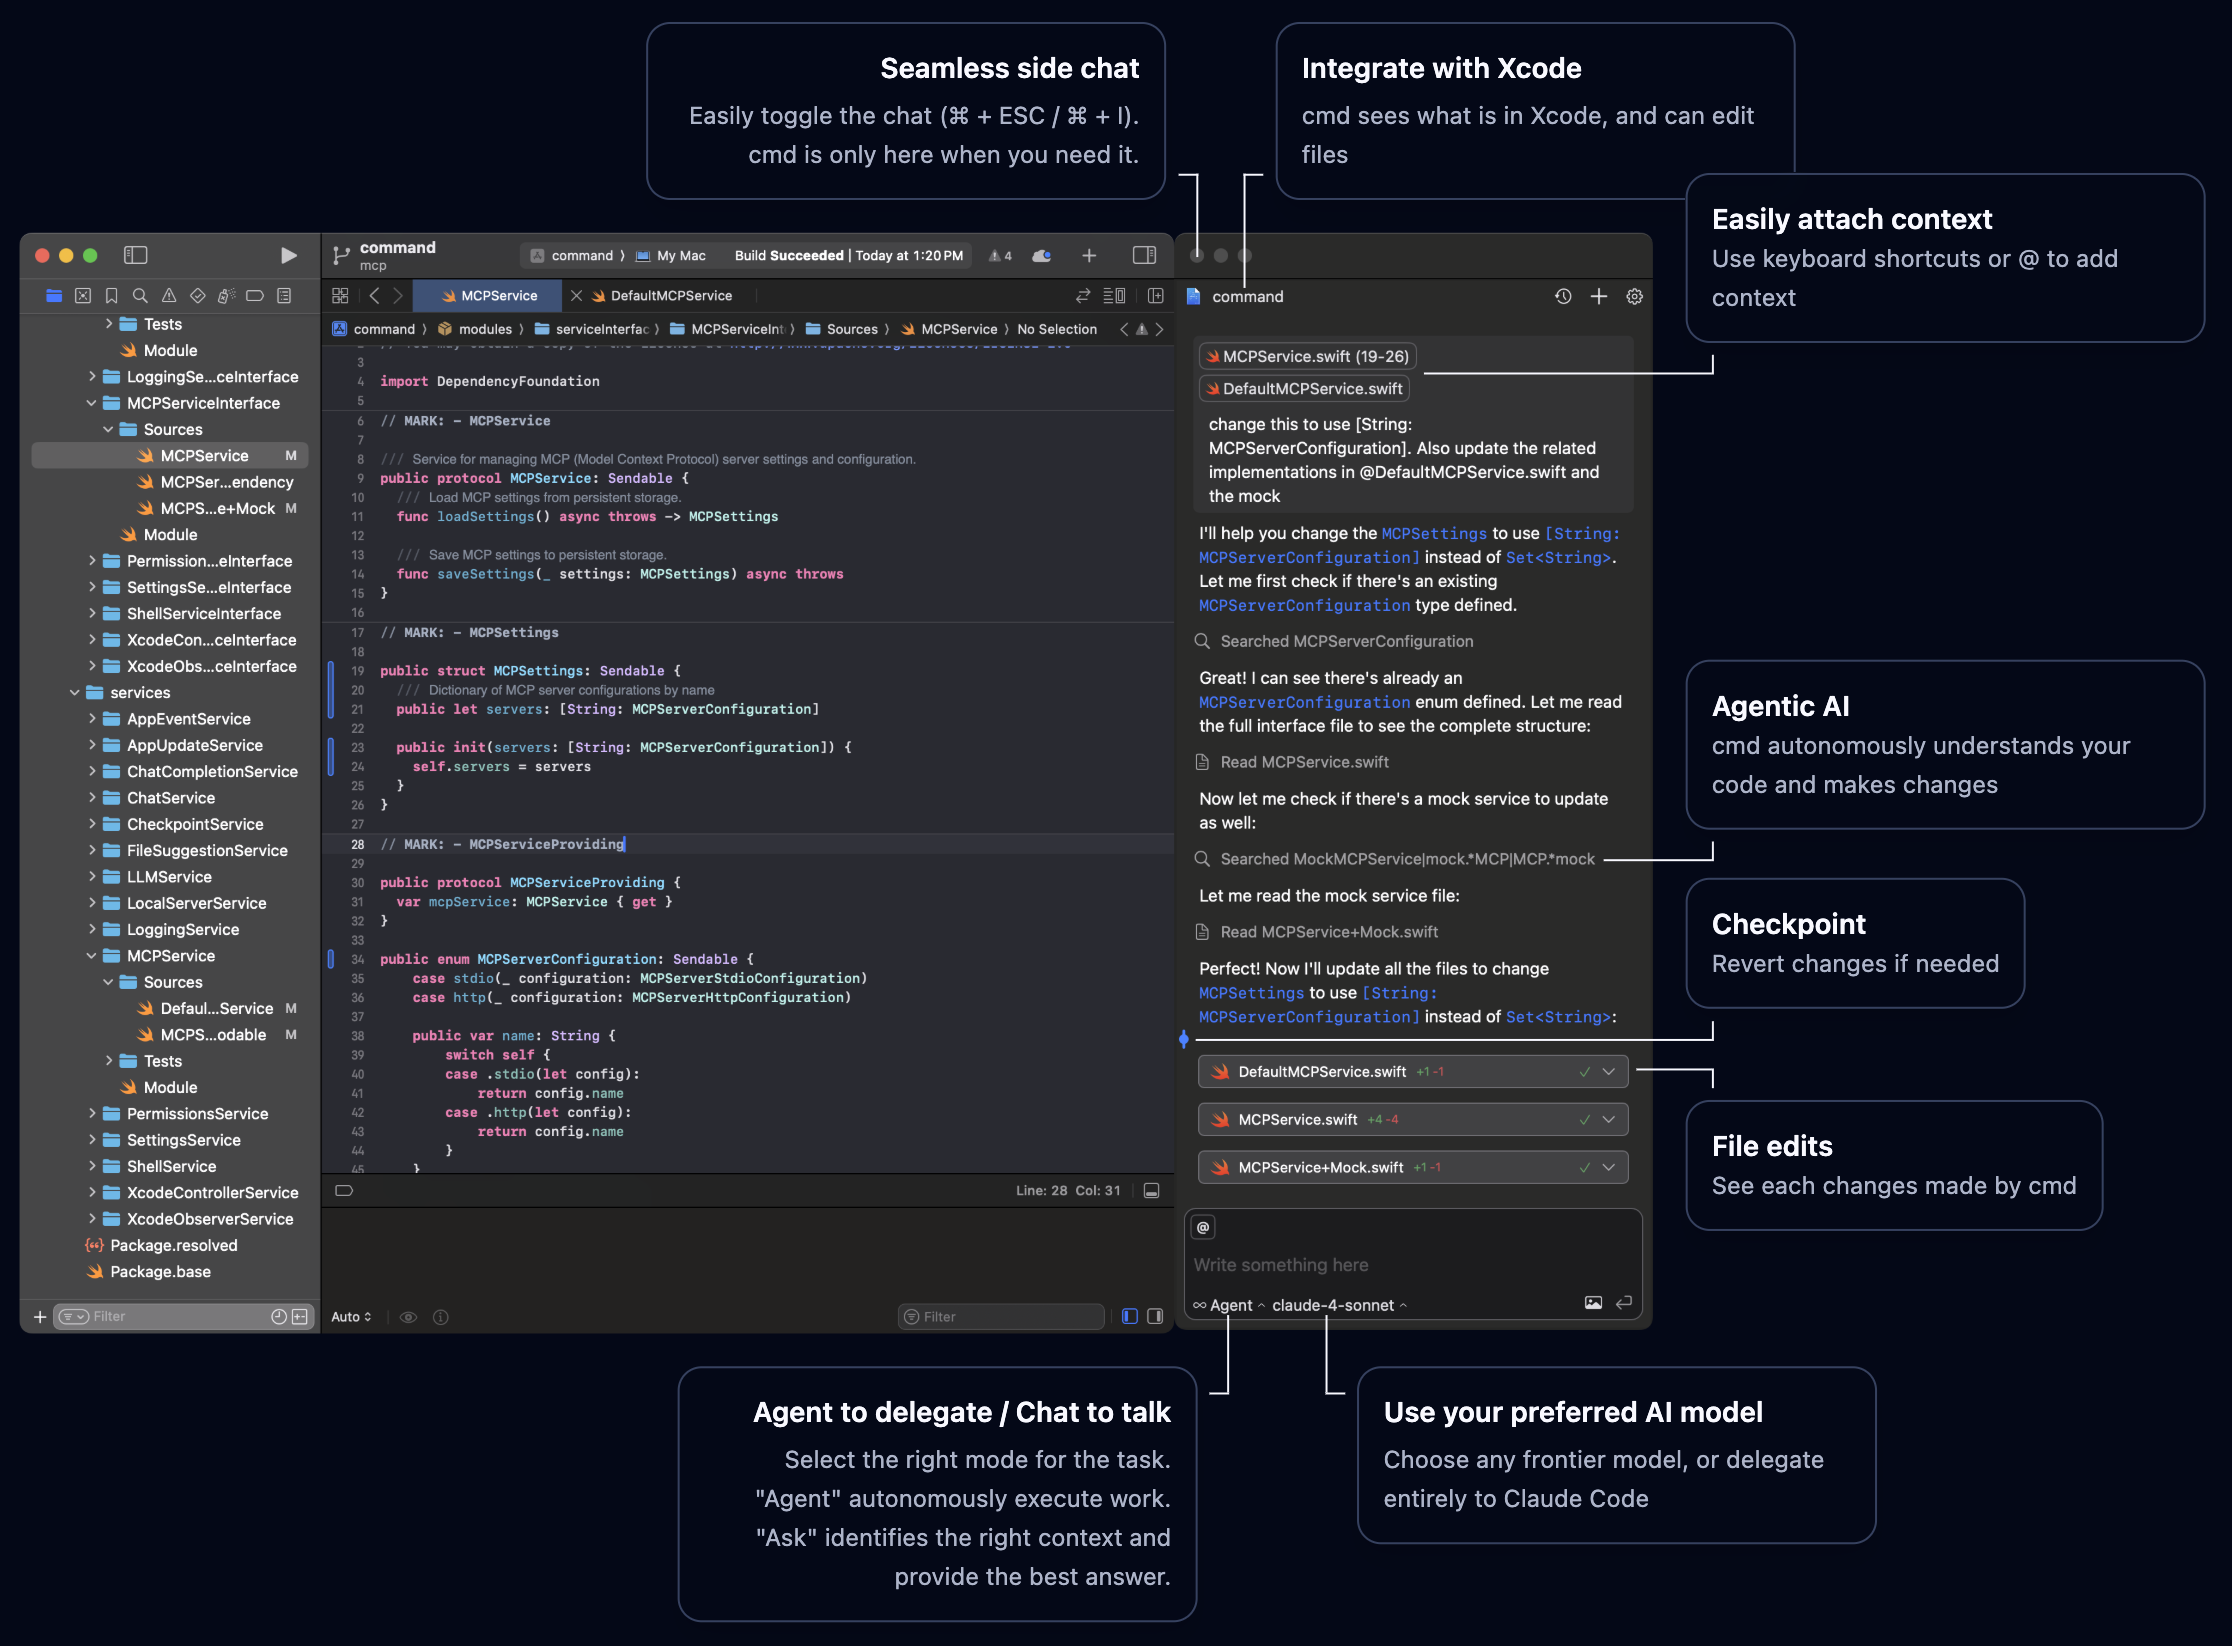
Let’s walk through using cmd for a simple task to get familiar with the interface and workflow.1
Open a Project in Xcode
Launch Xcode and open any project (or create a new one if you don’t have one handy).
2
Verify cmd is Connected
Check that:
- The ⌘ menu bar icon is visible
- Bring up cmd’s chat interface by using
⌘+I, or using the menu bar.
3
Add code selection
Open a Swift file and select a code snippet you want to work with. Press
⌘ + ⇧ + I4
Ask cmd a Question
Try asking cmd something simple like:
- “Explain what this function does”
- “Add comments to this code”
- “What does this class do?”
Understanding Modes
cmd offers different modes for different workflows. Try switching between them:- Agent Mode
- Chat Mode
Best for: Complex tasks, code generation, refactoringIn Agent mode, cmd can:
- Edit multiple files
- Run builds and tests
- Fix errors it encounters
- Check its own work
- “Add error handling to this networking code”
- “Refactor this view controller to use SwiftUI”
- “Create a new data model for user preferences”
cmd will always ask before making changes, unless a permission is granted permanently.
Switching Models
Different tasks benefit from different AI models:1
Open Model Selector
Click the model dropdown at the top of the cmd sidebar.
2
Choose a Model
Select from your enabled models:
- Fast models (GPT-3.5, Claude Haiku): Quick answers and simple tasks
- Balanced models (Claude Sonnet, GPT-4 Turbo): Most coding tasks
- Powerful models (Claude Opus, GPT-5): Complex problems
3
Continue Your Task
cmd will use the selected model for subsequent requests.
Using Xcode 26 Integration
If you configured Xcode 26 integration during installation:Using Xcode's Built-in Chat
Using Xcode's Built-in Chat
- Open Xcode 26’s AI chat interface
- Select cmd, then your desired model
- Ask questions or request changes
- cmd provides the AI capabilities behind the scenes
- You get Xcode’s native interface with cmd’s agentic AI
Switching Between Interfaces
Switching Between Interfaces
You can use both interfaces interchangeably based on your preference. Both use the same cmd configuration and AI providers.
Having issues? Open an issue on GitHub.